【画像の拡大・縮小・回転】最近傍法(Nearest Neighbor)とバイリニア補完法(Bi-linear Interpolation)
- 最近傍法(Nearest Neighbor)とバイリニア補完法(Bi-linear interpolation)
- 最近傍法とバイリニア補完法のプログラム
- 最近傍法とバイリニア補完法で処理した画像
- 最近傍法とバイリニア補完法を実装してみた感想
- 参考文献
最近傍法(Nearest Neighbor)とバイリニア補完法(Bi-linear interpolation)
今回は、画像を拡大、縮小、回転する際の手法である最近傍法とバイリニア補完法の2種類のプログラムを実装したのでご紹介します。使用した言語はC++です。Pythonの方が実装が楽だとは思いますが処理速度はC++が早いです。
最近傍法(Nearest Neighbor)
画像を処理(拡大・縮小・回転)した際に元画像の最近傍にある画素値をそのまま利用する方法です。イメージとしては、処理した画像の画素値が元画像のどこの画素値に対応するかな?ということです。逆写像(Inverse Mapping)をイメージしてもらえるとわかりやすいと思います。
最近傍法(Nearest Neighbor)での拡大・縮小
元画像の画素値f(x,y)、拡大率α、処理後画像の画素値をg(x,y)とすると
で拡大・縮小後の画素値を求めることができます。
拡大、縮小後の座標値
最近傍法(Nearest Neighbor)での回転
画像の回転では角度、回転後の座標
としたとき
と元画像の座標に回転行列をかけることで回転後の座標値を表すことができる。(2)を計算すると
と上記のようになる。回転行列については加法定理から簡単に導き出せるので気になる方はそちらも調べてみてください。( 今回は省きます)
先程と同様に座標値は整数なので、回転後の座標値
と表すことができます。
回転において画像のサイズを超えた画素値を参照する場合は画素値を0(黒色)にする処理を行いました。
バイリニア補完法(Bi-linear Interpolation)
バイリニア補完法は周囲の4画素を用いて画像を拡大、縮小、回転する方法で下記に周辺4画素を用いた補完方法の図を示します(手書きで申し訳ないです…汗)
は元画像における
の輝度値で、
もそれぞれの輝度値を示しています。

を基準に青い画素までの距離を
とおいて表記してます。元画像の周辺4画素
からの距離が近いほど値が大きくなるように重み付けを行い、周囲4画素値の加重平均を処理後の座標
における画素値としました。これは以下の式で表すことができます。
元画像の大きさを超える処理がある場合は元画像の最大座標の輝度値を取得するようにします。
最近傍法とバイリニア補完法の違い
最近傍法では拡大する際は足りない部分の画素値を元画像における最近傍の画素値を取得します。これは画素値のコピーなので単純なアルゴリズムで高速な処理で行うことができます。その反面、画像内の輪郭の画素がはっきりするため画像の輪郭部分がガタガタになると考えられる。
バイリニア補完法では周囲4画素の距離を求め重み付けをしなければいけないため処理速度は最近傍法より劣ることが考えられる。加重平均で画素値を補完しているため、輪郭部分ではガタガタした感じはなくきれいな補完ができると考えられる。
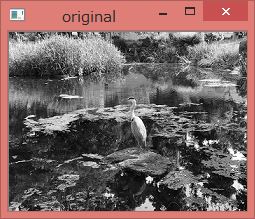
では、実際にc++で実装してそれぞれの違いを見てみようと思います!ちなみに周辺16画素を参照するバイキュービック法(Bicubic法)もありますが処理が複雑で大変なので今回は実装しません!今回、使用する画像を下記に載せます。プログラムは長いのでPCで見ることをおすすめします!
最近傍法とバイリニア補完法のプログラム
#include<iostream>
#include<opencv2/highgui.hpp>
#include<opencv2/imgproc.hpp>
#include<math.h>
#define PI 3.141592

using namespace std;
using namespace cv;

void image_view_create(Mat_<unsigned char> image, string window_name); //画像を描画するための関数
Mat_<unsigned char> nealestNeighbor_zoomOut(Mat_<unsigned char> image, double magnification); //最近傍法で拡大・縮小する関数
Mat_<unsigned char> nealestNeighbor_rotate(Mat_<unsigned char> image, double angle);//最近傍法で回転させる関数
Mat_<unsigned char> nealestNeighbor(Mat_<unsigned char> image, double magnification = 0, double angle = 0);//最近傍法で拡大・縮小・回転をまとめた関数
Mat_<unsigned char> bilinearInterpolation_zoomOut(Mat_<unsigned char> image, double magnification);//バイリニア補完法で拡大・縮小する関数
Mat_<unsigned char> bilinearInterpolation_rotate(Mat_<unsigned char> image, double angle);//バイリニア補完法で回転させる関数
Mat_<unsigned char> bilinearInterpolation(Mat_<unsigned char> image, double magnification = 0, double angle = 0);//バイリニア補完法で拡大・縮小・回転をまとめた関数
int main()
{
	//input image
	Mat_<unsigned char> hibiya = imread("D:\\Users\\kazuto yunoki\\Desktop\\image_engineering\\image\\hibiya.jpg", 0);
	Mat_<unsigned char> checker = imread("D:\\Users\\kazuto yunoki\\Desktop\\image_engineering\\image\\checker.jpg", 0);

	image_view_create(hibiya, "original");

	//nealestNeighbor(引数:画像、倍率、角度)
	//Mat_<unsigned char> result_image = nealestNeighbor(hibiya, 2, 30);

	//bilinearInterpolation(引数:画像、倍率、角度)
	Mat_<unsigned char> result_image = bilinearInterpolation(hibiya, 2, 30);

	//display image
 	image_view_create(result_image,"zoom2_rotate30");

	return 0;
}
void image_view_create(Mat_<unsigned char> image, string window_name)
{
	namedWindow(window_name, 1);
	imshow(window_name, image);
	waitKey(0);
	//imwrite(image_name, image);
	destroyWindow(window_name);
}
Mat_<unsigned char> nealestNeighbor_rotate(Mat_<unsigned char> image, double angle){

	Mat_<unsigned char> result_image = Mat::zeros(image.rows, image.cols, CV_8UC3);

	double rotate_x, rotate_y;

	//radの計算
	double rad = angle*PI / 180;
	//画像の幅、高さの中心
	int image_width_half = image.rows / 2;
	int image_height_half = image.cols / 2;

	for (int y = 0; y < image.cols; y++){
		for (int x = 0; x < image.rows; x++){
			//中心(画像の真ん中を中心とした回転)
			rotate_x = (x - image_width_half)*cos(rad) - (y - image_height_half)*sin(rad) + image_width_half;
			rotate_y = (x - image_width_half)*sin(rad) + (y - image_height_half)*cos(rad) + image_height_half;
			/*原点(左上を中心とした回転)
			rotate_x = x*cos(rad) - y*sin(rad);
			rotate_y = x*sin(rad) + y*cos(rad);
			*/
			//最近傍取得
			rotate_x = round(rotate_x);
			rotate_y = round(rotate_y);
			//画像のサイズを超えた場合の処理(黒)
			if (rotate_x > image.rows - 1 || rotate_y > image.cols - 1){
				result_image(x, y) = 0;
				continue;
			}
			if (rotate_x < 0 || rotate_y < 0){
				result_image(x, y) = 0;
				continue;
			}
			result_image(x, y) = image(rotate_x, rotate_y);
		}
	}
	return result_image;
}
Mat_<unsigned char> nealestNeighbor_zoomOut(Mat_<unsigned char> image, double magnification){

	Mat_<unsigned char> result_image = Mat::zeros(round(image.rows * magnification),round(image.cols * magnification), CV_8UC3);
	int tempx, tempy;

	for (int y = 0; y < image.cols*magnification; y++){
		for (int x = 0; x < image.rows * magnification; x++){
			//最近傍取得
			tempx = round(x / magnification);
			tempy = round(y / magnification);
			//元画像のサイズを超える場合の処理
			if (tempx > image.rows-1){
				tempx = image.rows-1;
			}
			if (tempy > image.cols-1){
				tempy = image.cols-1;
			}
			result_image(x, y) = image(tempx, tempy);
		}
		cout << endl;
	}
	return result_image;
}
Mat_<unsigned char> nealestNeighbor(Mat_<unsigned char> image, double magnification, double angle){

	Mat_<unsigned char> result_image = nealestNeighbor_zoomOut(image, magnification);

	result_image = nealestNeighbor_rotate(result_image, angle);

	return result_image;
}
Mat_<unsigned char> bilinearInterpolation_zoomOut(Mat_<unsigned char> image,double magnification){

	Mat_<unsigned char> result_image = Mat::zeros(round(image.rows * magnification), round(image.cols * magnification), CV_8UC3);

	double tempx, tempy, dist_x, dist_y;
	int floor_x, floor_y;

	for (double y = 0; y < image.cols*magnification; y++){
		for (double x = 0; x < image.rows * magnification; x++){
			//元画像の座標(小数点を含む)
			tempx = (x / magnification);
			tempy = (y / magnification);
			//元画像の座標(切り捨て・・・元画像の左上)
			floor_x = floor(tempx);
			floor_y = floor(tempy);
			//サイズ外の処理
			if (floor_x > image.rows - 1){
				floor_x = image.rows - 1;
				tempx = image.rows - 1;
			}
			else if (floor_x + 1 > image.rows - 1){
				floor_x = image.rows - 2;
				tempx = image.rows - 2;
			}
			if (floor_y > image.cols - 1){
				floor_y = image.cols - 1;
				tempy = image.cols - 1;
			}
			else if(floor_y + 1 > image.cols - 1){
				floor_y = image.cols - 2;
				tempy = image.cols - 2;
			}
			dist_x = abs(tempx - (double)floor_x);
			dist_y = abs(tempy - (double)floor_y);
			//cout << dist_x << ", " << dist_y << endl;
			result_image(x, y) = (1.0 - dist_x)*(1.0 - dist_y)*image(floor_x, floor_y)
						       + dist_x*(1.0 - dist_y)*image(floor_x + 1, floor_y)
				               + (1.0 - dist_x)*dist_y*image(floor_x, floor_y + 1)
				               + dist_x*dist_y*image(floor_x + 1, floor_y + 1);
		}
	}
	return result_image;
}
Mat_<unsigned char> bilinearInterpolation_rotate(Mat_<unsigned char> image, double angle)
{
	Mat_<unsigned char> result_image = Mat::zeros(image.rows, image.cols, CV_8UC3);

	double rotate_x, rotate_y, dist_x, dist_y;;
	int floor_x, floor_y;

	double rad = angle*PI / 180;

	int image_width_half = image.rows / 2;
	int image_height_half = image.cols / 2;

	for (int y = 0; y < image.cols; y++){
		for (int x = 0; x < image.rows; x++){
			//中心(画像の真ん中を中心とした回転)
			rotate_x = (x - image_width_half)*cos(rad) - (y - image_height_half)*sin(rad) + image_width_half;
			rotate_y = (x - image_width_half)*sin(rad) + (y - image_height_half)*cos(rad) + image_height_half;
			/*原点(左上を中心とした回転)
			rotate_x = x*cos(rad) - y*sin(rad);
			rotate_y = x*sin(rad) + y*cos(rad);
			*/
			//最近傍取得
			floor_x = floor(rotate_x);
			floor_y = floor(rotate_y);
			//画像のサイズを超えた場合の処理(黒)
			if (rotate_x > image.rows - 1 || rotate_y > image.cols - 1){
				result_image(x, y) = 0;
				continue;
			}
			if (rotate_x < 0 || rotate_y < 0){
				result_image(x, y) = 0;
				continue;
			}
			dist_x = abs(rotate_x - (double)floor_x);
			dist_y = abs(rotate_y - (double)floor_y);

			result_image(x, y) = (1.0 - dist_x)*(1.0 - dist_y)*image(floor_x, floor_y)
				+ dist_x*(1.0 - dist_y)*image(floor_x +1, floor_y)
				+ (1.0 - dist_x)*dist_y*image(floor_x, floor_y + 1)
				+ dist_x*dist_y*image(floor_x + 1, floor_y + 1);
		}
	}
	return result_image;
}
Mat_<unsigned char> bilinearInterpolation(Mat_<unsigned char> image, double magnification, double angle)
{
	Mat_<unsigned char> result_image = bilinearInterpolation_zoomOut(image, magnification);

	result_image = bilinearInterpolation_rotate(result_image, angle);

	return result_image;
}
長くなりましたが、上で説明したことをベタ書きしただけです。テキストエディタはVisualStudio2013を使用しています。画像の取り込みはOpencvで行っています。VisualStudioにOpencvはもともと入っていないので別途インストールと環境設定が必要です。また、時間があれば導入方法についても記事にしたいと思います。
最近傍法とバイリニア補完法で処理した画像
最近傍法とバイリニア補完法でそれぞれ2倍に拡大し、30°回転させました。

最近傍法とバイリニア補完法を実装してみた感想
今回は画像サイズが約255×200の5万画素数と少なく、c++で実装したためどちらの手法も処理速度は同じでほぼ一瞬でした。高性能カメラ2000万画素とかありますが、その写真で撮った画像使って処理速度比較するのも面白そうですね!Pythonは勉強中なのでいずれPythonでも実装してみたいと思います。とにかく、画像を拡大、縮小、回転するだけでも結構考えることがあり大変ですね…。
参考文献
- Rafael C. Gonzalez・Richard E. Woods (2018). 「Digital Image Processing」4th Edition p77~p82
- 「【画像処理】最近傍補間法の原理・計算式」https://algorithm.joho.info/image-processing/nearest-neighbor-linear-interpolation/ (最終アクセス 2019/10/25)
- 「【画像処理】バイリニア補間法の原理・計算式」https://algorithm.joho.info/image-processing/bi-linear-interpolation/ (最終アクセス 2019/10/25)
- 「画素の補間(Nearest neighbor,Bilinear,Bicubic)」https://imagingsolution.blog.fc2.com/blog-entry-142.html (最終アクセス2019/10/25)